Smart Switch NodeMCU – Works with Google Home & Amazon Alexa

Google assistant is AI (Artificial Intelligence) based voice command service. Using voice, we can interact with google assistant and it can search on the internet, schedule events, set alarms, control appliances, etc. This service is available on smartphones and Google Home devices.

We can control smart home devices including lights, switches, fans, thermostats and many more devices using our Google Assistant.

A lot of commercial devices already exist in the market for such application but,. Here i have explained how to build your own smart switch using NodeMCU (ESP8266) development board and few other electrical components.

Components used;

  • NodeMCU (ESP8266) Development Board.
  • Solid State Relay Module.
  • 6V Power Supply Module.
  • Connection Wires.

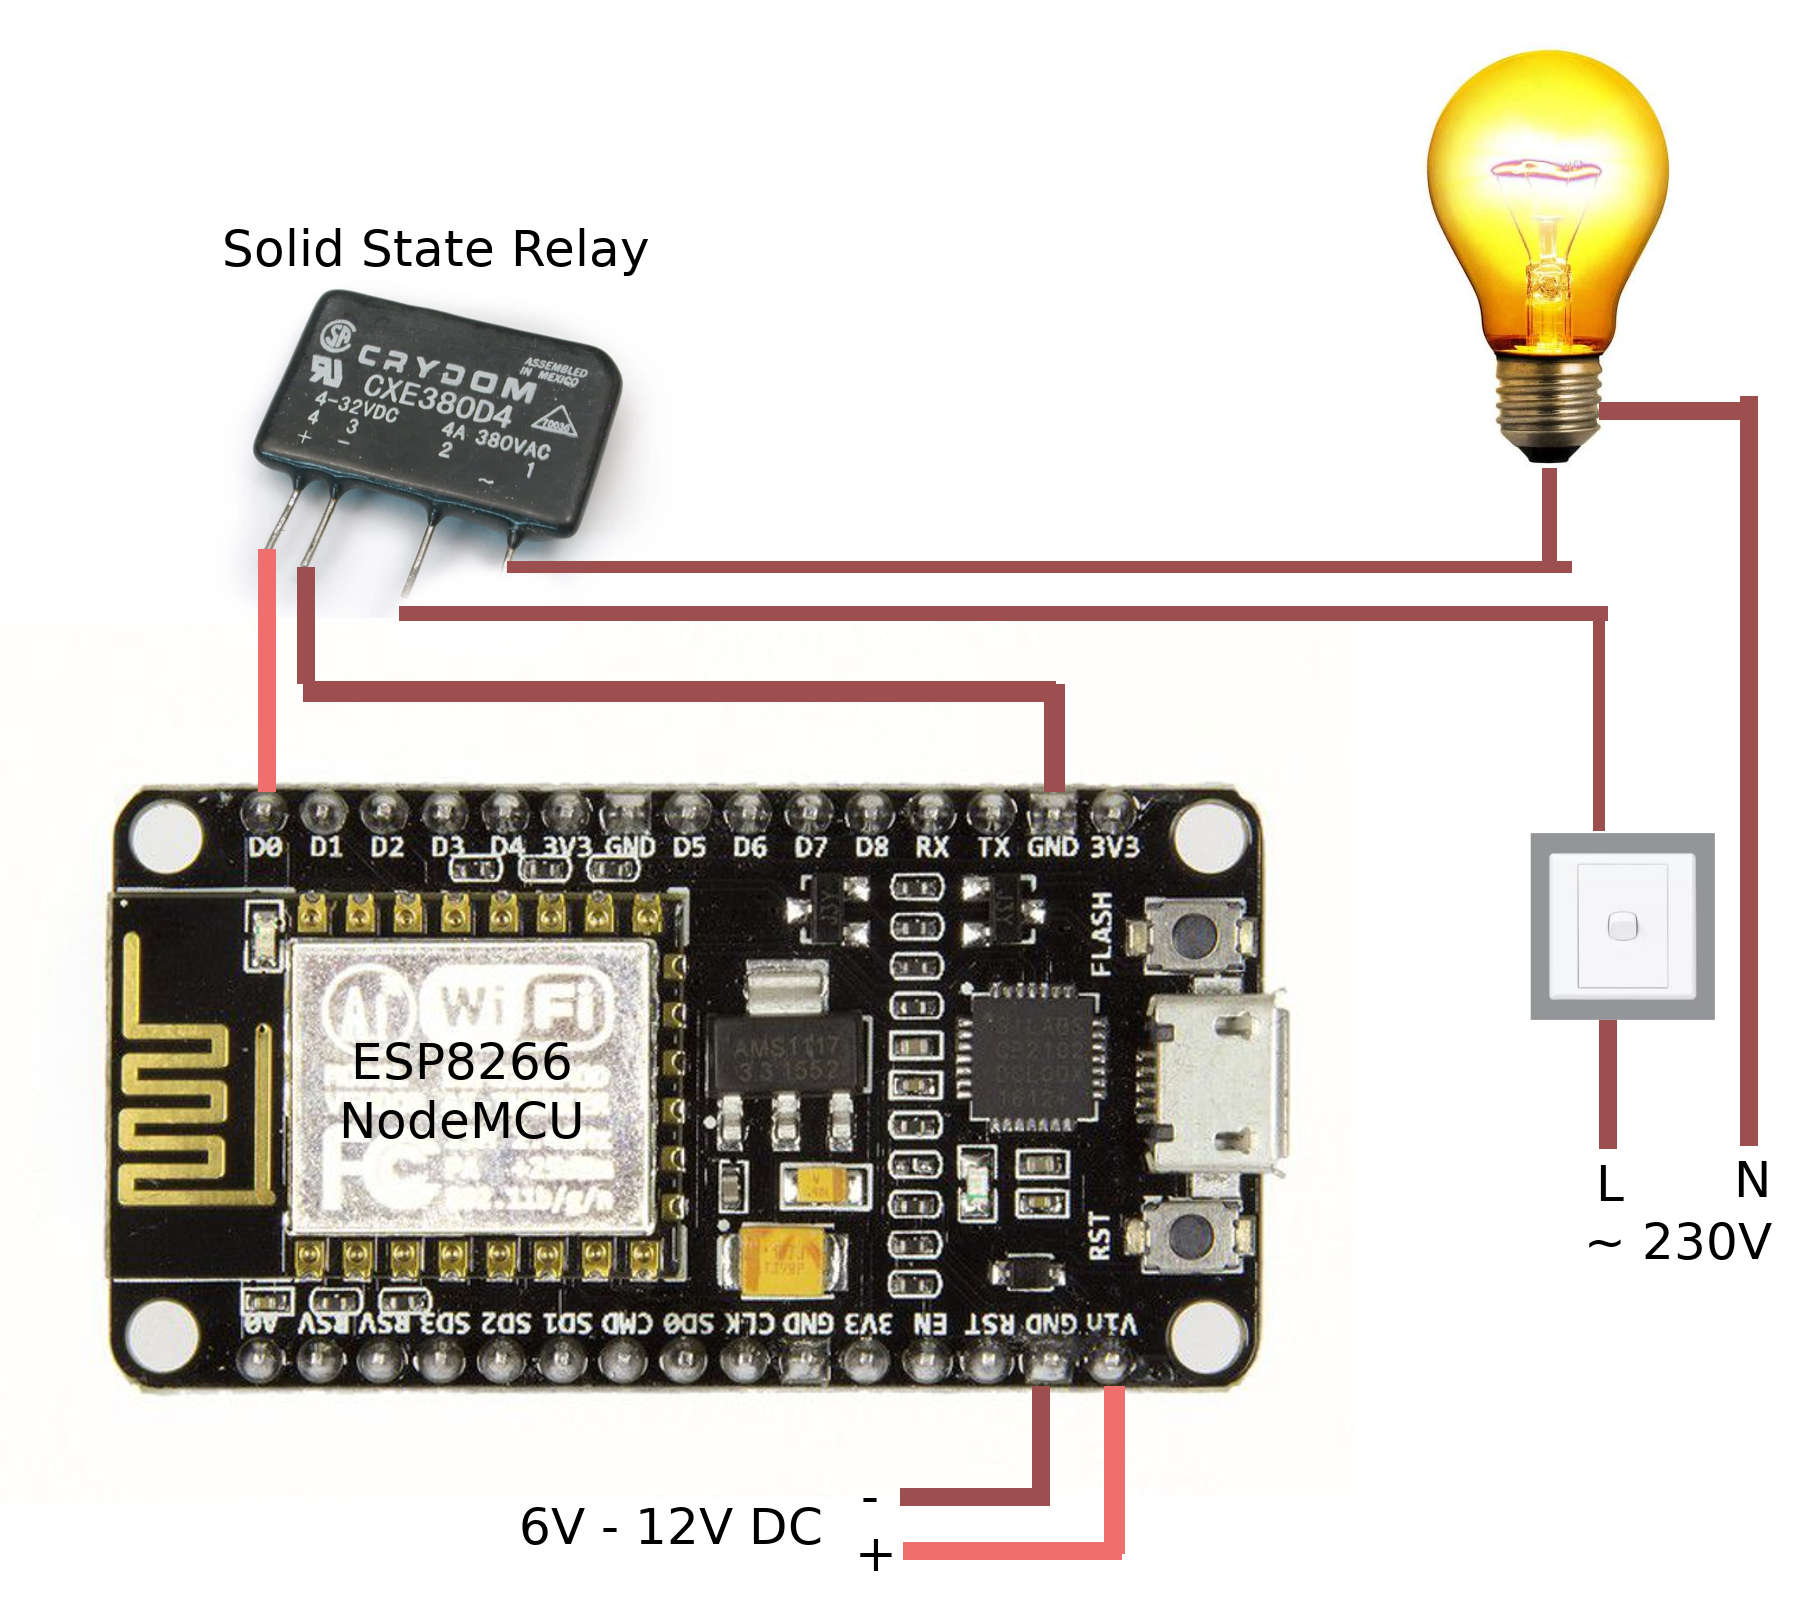
Above figure explained very simply about the circuit diagram. Be aware when you connecting this to the main power. If you don’t have enough knowledge about connecting this to the main power system, please get some help from a experienced  technician.

Before you connect using above explained diagram, you must programme the NodeMCU development board. Otherwise you cannot control it using Google Smart Home Assistant with voice commands.

In above diagram, i used D0 – Digital pin to control the input signal connected to the Solid State Relay module. When we want to switch on the light, we need to set it to high voltage state (5V), and when we want to switch of the light, we need to set it to low voltage state (0V).

You can find the source code which needs to be uploaded to the NodeMCU development borad using Arduino IDE here. https://github.com/lahirutm/WebserviceLK-IoT/blob/master/arduino_examples/state_save_light_example.ino

Once you programmed your NodeMCU, you must link it with Google Home Assistant to control using voice commands. Please follow the steps explained here.  https://iot.webservice.lk/

Enjoy using your own smart home devices…

Toroidal Transformers

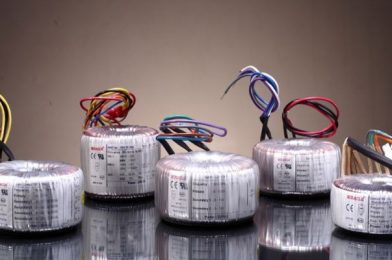
Transformers are made from a pair of solenoids wrapped around a metal core that is usually a ferrite. Toroidal transformers are two coils wrapped around a metal, such as a ferrite or silicon steel, that is doughnut shaped. The coils are either wrapped in different areas or placed one over the other. They are preferred for RF or radio frequency transformers, where they are used to increase or decrease voltages from power sources, and to isolate different parts in a circuit. RF transformers are also used for impedance matching, which means they help connect input and output parts of different circuits.

Here are five other reasons why toroidal transformers are used for many industrial applications:

  1. Low noise and low stray field – The field generated by magnetization, also known as the stray field, is lower in a toroidal transformer, due to the uniform core windings. Less magnetic interference in toroids results in higher performance.

  2. Easy to mount – Using just one screw, toroidal transformers can be easily mounted in a short time. This convenience helps limit maintenance and downtime.

  3. Low operating temperature – Toroidal transformers operate at lower temperatures than transformers with similar specifications.

  4. Light weight core – The core of a toroidal transformer weighs less than typical transformers due to it being comprised of less raw materials.

  5. More economical – Since toroidal transformer cores are manufactured from fewer materials, they weigh less than conventional transformers and use less energy, providing better cost savings and higher return on investment.

The toroidal transformers efficiency makes them useful for a wide array of machines such as audio/visual equipment, security systems, telecommunication systems, industrial control equipment and power distribution equipment. Cost efficiency is an important key to the widespread use of toroidal transformers, as well as the fact that they can be customized for any diameter and height.

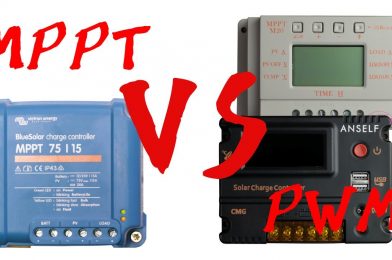
Difference Between MPPT and PWM Charge Controller


MPPT Solar Charge Controller

PWM Solar Charge Controller

1. What they do

The PWM controller is in essence a switch that connects a solar array to a battery. The result is that the voltage of the array will be pulled down to near that of the battery.

The MPPT controller is more sophisticated (and more expensive): it will adjust its input voltage to harvest the maximum power from the solar array and then transform this power to supply the varying voltage requirement, of the battery plus load. Thus, it essentially decouples the array and battery voltages so that there can be, for example, a 12 volt battery on one side of the MPPT charge controller and a large number of cells wired in series to produce 36 volts on the other.

As array size increases, cable length will increase. The option to wire more panels in series and thereby decrease the cable cross sectional area with a resultant drop in cost, is a compelling reason to install an MPPT controller as soon as the array power exceeds a few hundred Watts (12 V battery), or several 100s of Watts (24 V or 48 V battery).

PWM

The PWM charge controller is a good low cost solution for small systems only, when solar cell temperature is moderate to high (between 45°C and 75°C).

MPPT

To fully exploit the potential of the MPPT controller, the array voltage should be substantially higher than the battery voltage. The MPPT controller is the solution of choice for higher power systems (because of the lowest overall system cost due to smaller cable cross sectional areas). The MPPT controller will also harvest substantially more power when the solar cell temperature is low (below 45°C), or very high (above 75°C), or when irradiance is very low.

  • Charging Method
    The difference between the PWM controller and the MPPT solar controller is that they charge differently. The PWM is charged in a three-stage charging mode. MPPT is the maximum power tracking technology, and the charging efficiency can be increased to about 30%.
  • Voltage
    When the MPPT solar controller is used, the charging efficiency is more obvious when the high-voltage solar panel is used to charge the low-voltage battery. If the voltage of the solar energy and the battery are the same, for example, it is 12V, then the difference between the practical PWM and the MPPT controller is not very big.
  • Power
    If the power of the solar panel is small, it is more appropriate to select a PWM controller. Relatively speaking, if the power of the solar panel is large, MPPT is selected.Solar controllers, because the cost of MPPT solar controllers is high, if your solar panel power is small, it is a waste of MPPT controller.

Salt Water Batteries

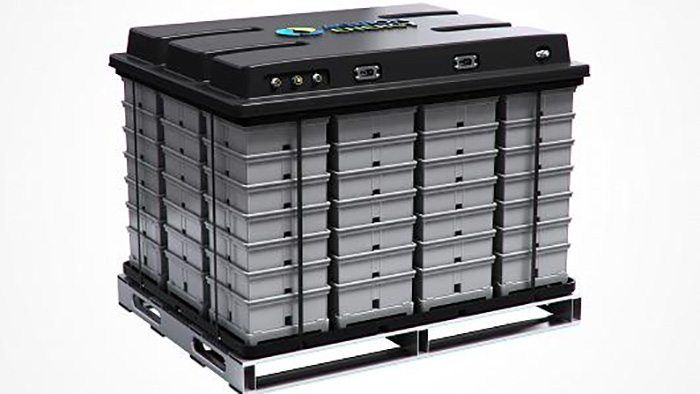
Saltwater batteries are not similar to lithium-ion batteries or lead acid batteries for use in portable devices or any automobiles. This is because they can’t hold as much charge in the same size and weight, or putting it another way, they are less energy-dense. But they hold some powerful advantages in applications in which size and weight are less important.

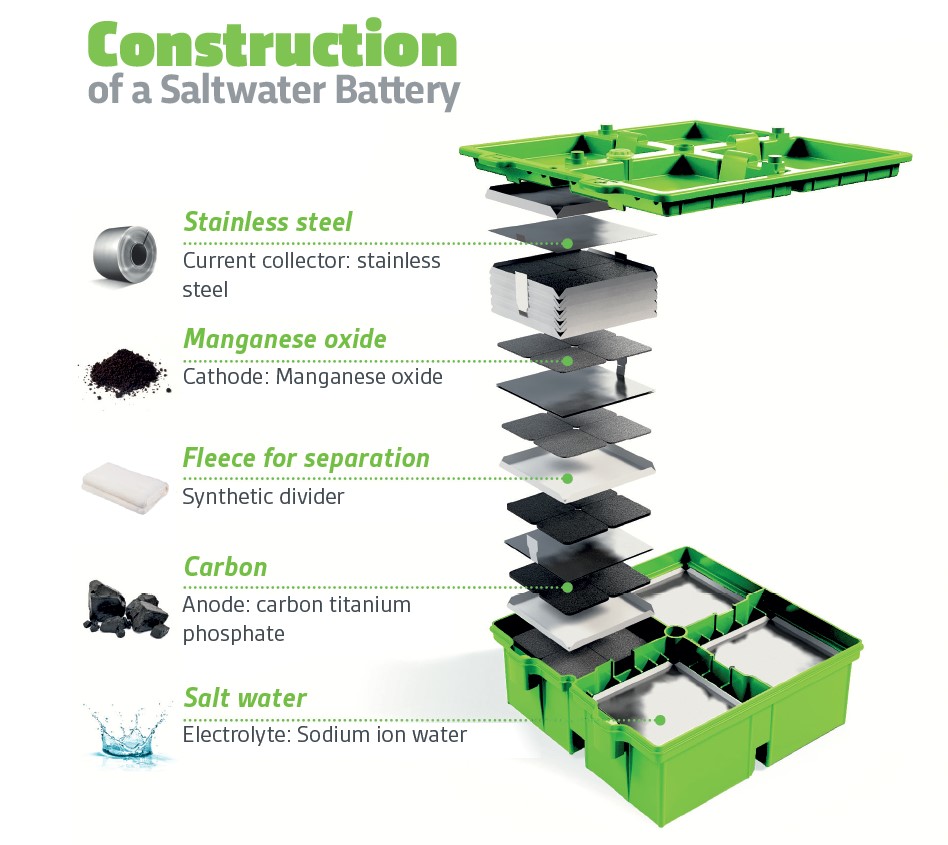
The electrolyte for a saltwater battery is nothing more than — salt water — hence the device’s name comes from it. The anode can be carbon, and the cathode can be a material such as manganese oxide. (Or anode can be copper and cathode can be zinc or aluminum).

With no hazardous materials in their construction, unlike lithium-ion batteries, they are non-toxic and they cannot explode. There is no need for the complex and troublesome electronic circuitry that every lithium-ion battery needs to ensure that they charge and discharge only within safe parameters. In addition, unlike their lithium-based cousins, saltwater batteries can be more deeply discharged (drained of electrical energy) with no damage to the battery.

The biggest disadvantage of all forms of salt-water batteries is that, to store a given amount of electricity, they are bulkier and heavier than other commercially available batteries. As it turns out, there is one huge potential use for these devices in which that will be no issue at all — smoothing out power from large-scale renewable-energy-generation plants.

Get selected location’s coordinates using Google’s Javascript API

To get the coordinates from a selected location on the map (Latitude and Longitude) to input fields, we can use Google’s Javascript MAP API. Here i have used a search field to search locations by name. Therefor i had to use Places API too.

How it works

I have used simple Bootstrap4 html page to place map. According to the Google’s documentation guide we can use below Javascript codes to get selected location’s coordinates in to two input fields at the bottom.


<script src="https://maps.googleapis.com/maps/api/js?key=AIzaSyAcr__t5RD7E40Yz6rgEVHQOAI4kcsMrIA&libraries=places&callback=initialize" async defer></script>
<script>
function initialize() {
	var myLatlng = new google.maps.LatLng(7.873053999999999,80.77179699999999);
	var myOptions = {
		zoom: 8,
		center: myLatlng,
		mapTypeId: google.maps.MapTypeId.ROADMAP
	}

	var map = new google.maps.Map(document.getElementById('map-canvas'), myOptions);

	// Create the search box and link it to the UI element.
	var input = document.getElementById('pac-input');
	var searchBox = new google.maps.places.SearchBox(input);
	map.controls[google.maps.ControlPosition.TOP_LEFT].push(input);

	var marker = new google.maps.Marker({
		draggable:true,
		position: myLatlng,
		map: map
	});

	// Bias the SearchBox results towards current map's viewport.
	map.addListener('bounds_changed', function() {
		searchBox.setBounds(map.getBounds());
	});

	google.maps.event.addListener(marker, 'dragend', function (event) {
		var poiLat = this.getPosition().lat();
		var poiLon = this.getPosition().lng();
		$('#latitude').val(poiLat);
		$('#longitude').val(poiLon);
	});

	var markers = [];
	// Listen for the event fired when the user selects a prediction and retrieve
	// more details for that place.
	searchBox.addListener('places_changed', function() {
		var places = searchBox.getPlaces();

		if (places.length == 0) {
			return;
		}

		// Clear out the old markers.
		markers.forEach(function(marker) {
			marker.setMap(null);
		});
		markers = [];

		// For each place, get the icon, name and location.
		var bounds = new google.maps.LatLngBounds();
		places.forEach(function(place) {
			if (!place.geometry) {
				console.log("Returned place contains no geometry");
				return;
			}

			var icon = {
				url: place.icon,
				size: new google.maps.Size(71, 71),
				origin: new google.maps.Point(0, 0),
				anchor: new google.maps.Point(17, 34),
				scaledSize: new google.maps.Size(25, 25)
			};

			// Create a marker for each place.
			marker.setPosition( place.geometry.location );
			map.panTo( place.geometry.location );
			$('#latitude').val(place.geometry.location.lat());
			$('#longitude').val(place.geometry.location.lng());

			if (place.geometry.viewport) {
			// Only geocodes have viewport.
				bounds.union(place.geometry.viewport);
			} else {
				bounds.extend(place.geometry.location);
			}
		});

		map.fitBounds(bounds);
	});
}

</script>

Here is the final output.

You can download the source code from my Github: https://github.com/lahirutm/Get-coordinates-using-Google-s-Javascript-API

Convert video files using FFMPEG in Linux

Convert MKV to MP4

ffmpeg -i video_file.mkv output_file.mp4

If you only want to convert MKV to MP4 then you will save quality and a lot of time by just changing the containers. Both of these are just wrappers over the same content so the CPU only needs to do a little work. Don’t re encode as you will definitely lose quality.

It’s very straight forward using ffmpeg:

ffmpeg -i LostInTranslation.mkv -codec copy LostInTranslation.mp4

Here, you are copying the video codec and audio codec so nothing is being encoded.

To convert all MKV files in the current directory, run a simple loop in terminal:

for i in *.mkv; do
    ffmpeg -i "$i" -codec copy "${i%.*}.mp4"
done

Note: If you get an error like this:

opus in MP4 support is experimental, add '-strict -2' if you want to use it.
Could not write header for output file #0 (incorrect codec parameters ?): Experimental feature

use

for i in *.mkv; do
ffmpeg
-i "$i" -codec copy -strict -2 "${i%.*}.mp4" done


Convert MP4 to AVI

In order to just copy the video and audio bitstream, thus without quality loss:

ffmpeg -i filename.mkv -c:v copy -c:a copy output.avi

If you want FFmpeg to convert video and audio automatically:

ffmpeg -i filename.mkv output.avi

Blinking LED With Arduino Nano

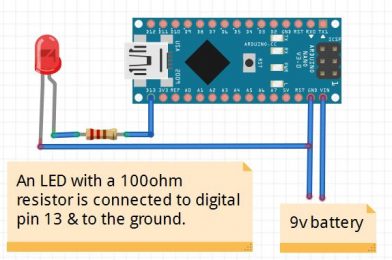
Things you need: Arduino Nano, 3V LED, 100 Ohm Resistor

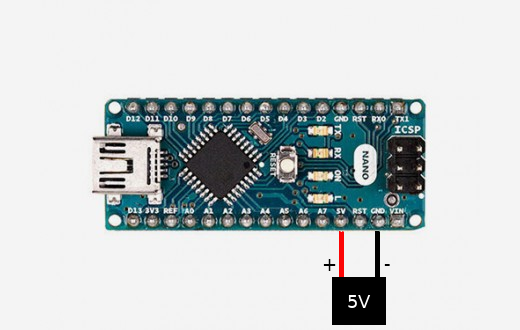
To power up the Arduino Nano board, you can use USB cable or an external power supply (7V ~ 12V DC) by connecting positive pin to VIN and and negative to the ground. Please see my previous post about powering up Arduino Nano here: https://blogs.webservice.lk/2020/03/17/powering-up-arduino-nano/

To connect LED, use LED’s positive end to the one end of resistor and other end to Arduino Nano’s digital pin 13 & negative end to the  one of Arduino Nano’s ground pin. Please see the picture above.

Now circuit making part is done, Let’s do the programing.

int ledPin =  13;// the number of the LED pin

void setup() {
  // set the digital pin as output:
  pinMode(ledPin, OUTPUT);
}

void loop() {
  digitalWrite(ledPin, HIGH);   // turn the LED on (HIGH is the voltage level)
  delay(1000);                       // wait for a second
  digitalWrite(ledPin, LOW);    // turn the LED off by making the voltage LOW
  delay(1000);
}

Upload above sketch to the Arduino Nano and see the result. Led will blink with the 1 second delay.

Powering Up Arduino Nano

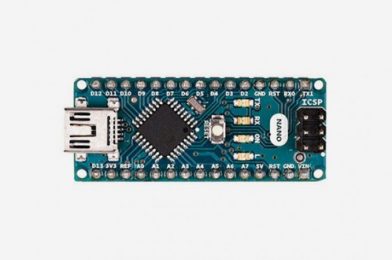
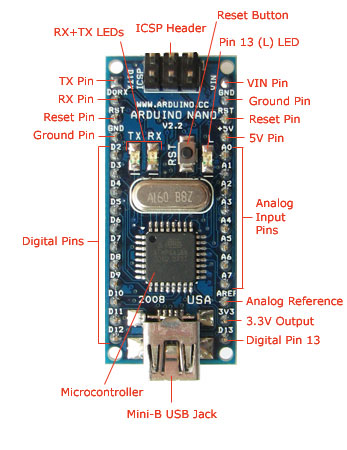
The Arduino Nano is a small, complete, and breadboard-friendly board based on the ATmega328P (Arduino Nano 3.x). It has more or less the same functionality of the Arduino Duemilanove, but in a different package. It lacks only a DC power jack, and works with a Mini-B USB cable instead of a standard one.

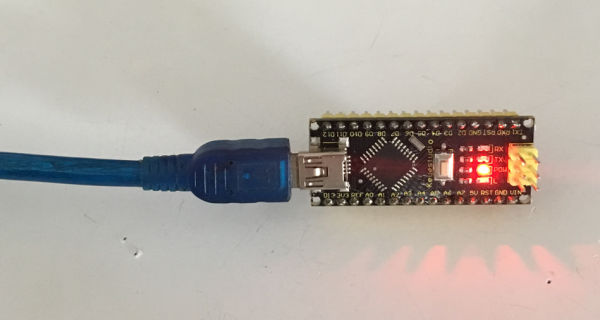
The Arduino Nano can be powered via the Mini-B USB Jack (5V) connection. 


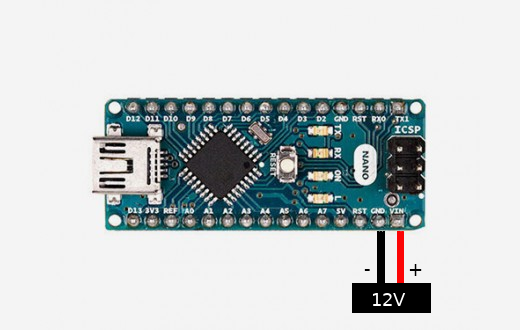
The Arduino Nano accepts the 7V to 12V input power from the Vin pin (pin30).


If you want to supply regulated power, then a 5V regulated adapter needs to feed the +5V pin (pin27) instead.


The power source is automatically selected to the highest voltage source if you input multiple power inputs.

Simple REST API php/mysql

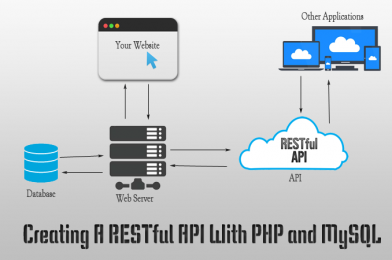
REST meaning of “REpresentational State Transfer”. It is a concept or an architecture for transfer information over the internet with unique and standard structure specially designed for it. REST concepts/architectures are referred as resources. A representation of a resource must be stateless and it is usually represented in JSON format.

API meaning of “Application Programming Interface”. It is a set of rules/methods that allows one piece of software application to talk to another with specially defined rules/methods with its own structure. Those “rules/methods” can include for create, read, update and delete operations.

Here i have explained, How to make a REST API for a CRUD (CREATE, READ, UPDATE, DELETE) application. For example, i am going to explain here;

I am going to use a test_database with the users table.

CREATE TABLE `users` (
  `id` int(11) NOT NULL,
  `first_name` varchar(255) NOT NULL,
  `last_name` varchar(255) NOT NULL,
  `email` varchar(255) NOT NULL,
  `username` varchar(255) NOT NULL,
  `password` varchar(255) NOT NULL,
  `status` int(11) NOT NULL DEFAULT '1'
) ENGINE=InnoDB DEFAULT CHARSET=latin1;
ALTER TABLE `users` ADD PRIMARY KEY (`id`);
ALTER TABLE `users` MODIFY `id` int(11) NOT NULL AUTO_INCREMENT;

Here are some test data to the table, for the testing purpose.

INSERT INTO `users` (`id`, `first_name`, `last_name`, `email`, `username`, `password`, `status`) VALUES
(1, 'John', 'Doe', 'jd@gmail.com', 'john', '2829fc16ad8ca5a79da932f910afad1c', 1),
(2, 'Peter', 'Alex', 'peter@gmail.com', 'peter', '827ccb0eea8a706c4c34a16891f84e7b', 1);

Let’s start to make a simple REST API step by step using PHP/MySQL according to the following;

How to create an user in the database ?
How to read user’s information from the database ?
How to update user’s information in the database ?
How to delete an user from the database ?

Additionally,

How to get all users list from the database ?
How to search users from the database ?

For the database connection i am using my database class discussed in a previous article. https://blogs.webservice.lk/2020/02/28/phpmysql-database-class/

How to create an user in the database ?

To create a user, we need to pass data to the create_user.php file. Here we only allow POST method to transfer data between the API and the application. API will return response in JSON format.

In this JSON response i have used;

response  – to get the status success/unsuccess
message – to describe the status
count – to get the row count in the data result (When fetching rows)
data – to get the fetched data. (Sometimes, insert id for insert operations)

create_user.php

<?php
header("Access-Control-Allow-Origin: *");
header("Content-Type: application/json; charset=UTF-8");
header("Access-Control-Allow-Methods: POST");
require('class.database.php');

$arr = [];
if($_SERVER['REQUEST_METHOD']=="POST"){
    if(isset($_POST['first_name'])) $first_name = $database->escape($_POST['first_name']);
    if(isset($_POST['last_name'])) $last_name = $database->escape($_POST['last_name']);
    if(isset($_POST['username'])) $username = $database->escape($_POST['username']);
    if(isset($_POST['password'])) $password = $database->escape($_POST['password']);
    if(isset($_POST['email'])) $email = $database->escape($_POST['email']);

    if(isset($first_name) && !empty($first_name)){
        if(isset($last_name) && !empty($last_name)){
            if(isset($username) && !empty($username)){
                if(isset($password) && !empty($password)){
                    if(isset($email) && filter_var($email,FILTER_VALIDATE_EMAIL)){
                        $sql = "INSERT INTO `users` 
                        (
                            `first_name`,`last_name`,`username`,`password`,`email`
                        ) 
                        VALUES (
                            '$first_name','$last_name','$username','".md5($password)."','$email'
                        )";

                        $insert_id = $database->insert($sql);

                        if($insert_id>0){
                            $arr = ["response"=>"success","message"=>"User successfuly created.","id"=>$insert_id];
                        }
                        else $arr = ["response"=>"unsuccess","message"=>"Create user failed. ".$database->error()];
                    }
                    else $arr = ["response"=>"unsuccess","message"=>"Valid email required !"];
                }
                else $arr = ["response"=>"unsuccess","message"=>"Password required !"];
            }
            else $arr = ["response"=>"unsuccess","message"=>"Username required !"];
        }
        else $arr = ["response"=>"unsuccess","message"=>"Last name required !"];
    }
    else $arr = ["response"=>"unsuccess","message"=>"First name equired !"];
}
else  $arr = ["response"=>"unsuccess","message"=>"Bad request !"];

echo json_encode($arr);
?>

We can test this create_user.php using POSTMAN or any REST API testing tool like RESTer extension installed in Firefox web browser. According to this example, we need to pass First Name, Last Name, Username, Password and the Email to create a new user as below.


How to read user’s information from the database ?

To read information for an user, we need to pass user’s id to get_user.php file and get the result related to the sent user id. Data can be sent only via POST method.

get_user.php

<?php
header("Access-Control-Allow-Origin: *");
header("Content-Type: application/json; charset=UTF-8");
header("Access-Control-Allow-Methods: POST");
require('class.database.php');

$arr = [];
if($_SERVER['REQUEST_METHOD']=="POST"){
    if(isset($_POST['id'])) $id = $database->escape($_POST['id']);

    if(isset($id) && !is_null($id) && $id>0){
        $sql = "SELECT * FROM `users` WHERE `id`='$id'";
        $results = $database->select($sql);
        $count = $database->num_rows($sql);

        if($count>0){
            $arr = ["response"=>"success","data"=>$results[0]];
        }
        else $arr = ["response"=>"unsuccess","message"=>"User not found !".$database->error()];                   
    }
    else $arr = ["response"=>"unsuccess","message"=>"Id required !"];
}
else  $arr = ["response"=>"unsuccess","message"=>"Bad request !"];

echo json_encode($arr);
?>

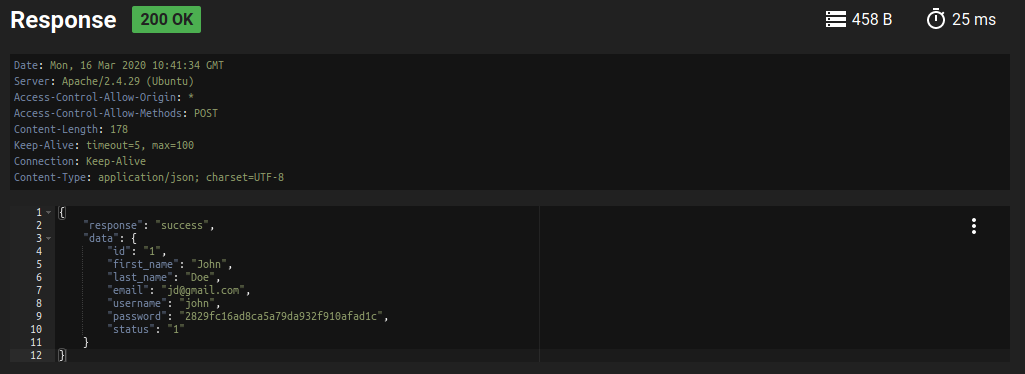
API will return response in JSON format. Here is the test result for sent id as 1. This will show the result for user id 1.

How to update user’s information in the database ?

To update an user, we need to send the id of the user we need to update and the required data to update in the database.

update_user.php

<?php
header("Access-Control-Allow-Origin: *");
header("Content-Type: application/json; charset=UTF-8");
header("Access-Control-Allow-Methods: POST");
require('class.database.php');

$arr = [];
if($_SERVER['REQUEST_METHOD']=="POST"){
    if(isset($_POST['id'])) $id = $database->escape($_POST['id']);
    if(isset($_POST['first_name'])) $first_name = $database->escape($_POST['first_name']);
    if(isset($_POST['last_name'])) $last_name = $database->escape($_POST['last_name']);
    if(isset($_POST['username'])) $username = $database->escape($_POST['username']);
    if(isset($_POST['password'])) $password = $database->escape($_POST['password']);
    if(isset($_POST['email'])) $email = $database->escape($_POST['email']);

    if(isset($id) && !is_null($id) && $id>0){
        if(isset($first_name) && !empty($first_name)){
            if(isset($last_name) && !empty($last_name)){
                if(isset($username) && !empty($username)){
                    if(isset($password) && !empty($password)){
                        if(isset($email) && filter_var($email,FILTER_VALIDATE_EMAIL)){
                            $sql = "UPDATE `users`SET 
                            `first_name`='$first_name',`last_name`='$last_name',`username`='$username',
                            `password`='".md5($password)."',`email`='$email'
                            WHERE id='$id'";

                            if($database->query($sql)===true){
                                $arr = ["response"=>"success","message"=>"User successfuly updated."];
                            }
                            else $arr = ["response"=>"unsuccess","message"=>"Update user failed. ".$database->error()];
                        }
                        else $arr = ["response"=>"unsuccess","message"=>"Valid email required !"];
                    }
                    else $arr = ["response"=>"unsuccess","message"=>"Password required !"];
                }
                else $arr = ["response"=>"unsuccess","message"=>"Username required !"];
            }
            else $arr = ["response"=>"unsuccess","message"=>"Last name required !"];
        }
        else $arr = ["response"=>"unsuccess","message"=>"First name equired !"];
    }
    else $arr = ["response"=>"unsuccess","message"=>"Id required !"];
}
else  $arr = ["response"=>"unsuccess","message"=>"Bad request !"];

echo json_encode($arr);
?>


How to delete an user from the database ?

To delete an user from the database, we need to pass the id of the user in the database to the delete_user.php file. Here i am not going to delete the user information from the database and used a status field to update the user’s status to the value zero. So status=0 rows are deleted users. [We should not delete important data permanently in our real applications, because these records will very important in one day to audit some database operations.]

delete_user.php

<?php
header("Access-Control-Allow-Origin: *");
header("Content-Type: application/json; charset=UTF-8");
header("Access-Control-Allow-Methods: POST");
require('class.database.php');

$arr = [];
if($_SERVER['REQUEST_METHOD']=="POST"){
    if(isset($_POST['id'])) $id = $database->escape($_POST['id']);

    if(isset($id) && !is_null($id) && $id>0){
        $sql = "UPDATE `users` SET `status`=0 WHERE `id`='$id'";

        if($database->query($sql)===true){
            $arr = ["response"=>"success","message"=>"User successfuly deleted."];
        }
        else $arr = ["response"=>"unsuccess","message"=>"Delete user failed. ".$database->error()];                   
    }
    else $arr = ["response"=>"unsuccess","message"=>"Id required !"];
}
else  $arr = ["response"=>"unsuccess","message"=>"Bad request !"];

echo json_encode($arr);
?>

How to get all users list from the database ?

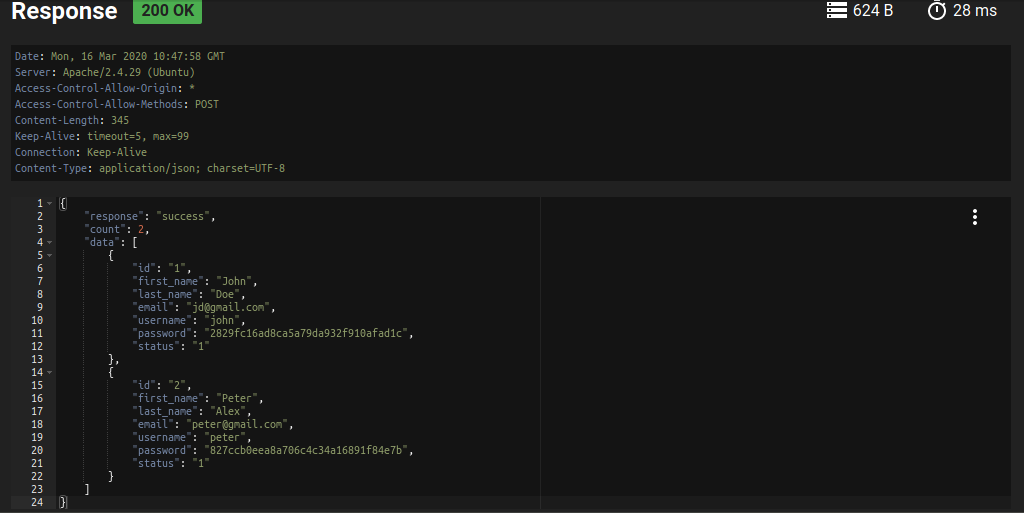
To get all users we can sent request using POST method without any parameters since we don’t want to add any filter to the fetching result. Here i have only returned the rows with status=1. Because status=0 are the deleted rows and we don’t need to show them when fetching users from the database.

get_users.php

<?php
header("Access-Control-Allow-Origin: *");
header("Content-Type: application/json; charset=UTF-8");
header("Access-Control-Allow-Methods: POST");
require('class.database.php');

$arr = [];
if($_SERVER['REQUEST_METHOD']=="POST"){
        $sql = "SELECT * FROM `users` WHERE `status`=1 ";
        $results = $database->select($sql);
        $count = $database->num_rows($sql);

        if($count>0){
            $arr = ["response"=>"success","count"=>$count,"data"=>$results];
        }
        else $arr = ["response"=>"unsuccess","message"=>"No users found. ".$database->error()];
}
else  $arr = ["response"=>"unsuccess","message"=>"Bad request !"];

echo json_encode($arr);
?>

Here is the test result using RESTer extension installed in the Firefox web browser.

How to search users from the database ?

To search users from the database, we can send search parameters to the serach_user.php file. According to this example, we can search users using their First Name, Last Name, Username and Email.

search_user.php

<?php
header("Access-Control-Allow-Origin: *");
header("Content-Type: application/json; charset=UTF-8");
header("Access-Control-Allow-Methods: POST");
require('class.database.php');

$arr = [];
if($_SERVER['REQUEST_METHOD']=="POST"){
    if(isset($_POST['first_name'])) $first_name = $database->escape($_POST['first_name']);
    if(isset($_POST['last_name'])) $last_name = $database->escape($_POST['last_name']);
    if(isset($_POST['username'])) $username = $database->escape($_POST['username']);
    if(isset($_POST['email'])) $email = $database->escape($_POST['email']);

        $sql = "SELECT * FROM `users` WHERE `status`=1 ";

        if(isset($first_name) && !empty($first_name)){
            $sql .= " AND `first_name` LIKE '%".$first_name."%' ";
        }
        if(isset($last_name) && !empty($last_name)){
            $sql .= " AND `last_name` LIKE '%".$first_name."%' ";
        }
        if(isset($username) && !empty($username)){
            $sql .= " AND `username` LIKE '%".$first_name."%' ";
        }    
        if(isset($email) && !empty($email)){
            $sql .= " AND `email` LIKE '%".$first_name."%' ";
        }
        
        $results = $database->select($sql);
        $count = $database->num_rows($sql);

        if($count>0){
            $arr = ["response"=>"success","count"=>$count,"data"=>$results];
        }
        else $arr = ["response"=>"unsuccess","message"=>"No users found for the search. ".$database->error()];
}
else  $arr = ["response"=>"unsuccess","message"=>"Bad request !"];

echo json_encode($arr);
?>

Matched search response will returned the status, row count and the result in JSON format.

Likewise, we can create a simple REST API using PHP/MySQL for our cross-platform applications to communicate between the database and the application. This is just an example only. To use this in a production application, we need to think about it’s security and many more things.

You can download this source files from my Github: https://github.com/lahirutm/REST-API-php-mysql
Bootstrap 4 Login Page – PHP/MySQL

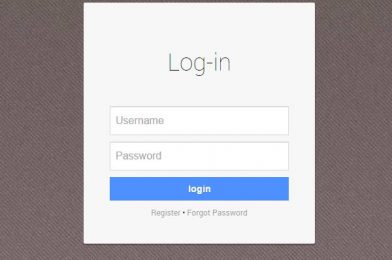
Here i have created a login page where user can enter their email address and password. When user submit the form, inputs will be verified against the credentials stored in the database, if the email and password match, the user is authorized and granted. Otherwise it will display error message.

You would need database connection to connect to MySQL database.

I have already posted a post about creating a database class for PHP/MySQL. I would suggest you to go through the previous post PHP/MySQL Database Class before following this.

login.php

Let’s create a file named “login.php” and place the following code. This file contains php scripts and HTML code for the login page. Here i have fetched the user from the database according to the entered username and compared the password hash in the database with the entered password’s hash (I have used md5 password hashing method). If both hashes are exactly same, register user id in the session and redirect to the index.php page.

<?php
require('class.database.php');

if(isset($_POST['submit'])){
	if(isset($_POST['username'])){
		if(isset($_POST['password'])){
			$username = $database->escape($_POST['username']);
			$password = $database->escape($_POST['password']);

			$sql = "SELECT * FROM users WHERE username='$username'";
			$results = $database->select($sql);
			if(is_array($results) && count($results)>0){
				$password_hash = $results[0]['password'];
				if($password_hash==md5($password)){
					// Username & password correct
					session_start();
					$_SESSION['user_id'] = $results[0]['id'];
					header('location:index.php');
				}
				else $ermsg = "Password incorrect !";
			}
			else $ermsg = "User not found !";
		}
		else $ermsg = "Password required !";
	}
	else $ermsg = "Username required !";
}
?>
<!DOCTYPE html> 
<html lang="en"> 
<head> <!-- Required meta tags --> 
  <meta charset="utf-8"> 
  <meta name="viewport" content="width=device-width, initial-scale=1, shrink-to-fit=no"> <!-- Bootstrap CSS --> 
  <link rel="stylesheet" href="https://maxcdn.bootstrapcdn.com/bootstrap/4.0.0/css/bootstrap.min.css" integrity="sha384-Gn5384xqQ1aoWXA+058RXPxPg6fy4IWvTNh0E263XmFcJlSAwiGgFAW/dAiS6JXm" crossorigin="anonymous">
  <!--Fontawesome CDN-->
  <link rel="stylesheet" href="https://use.fontawesome.com/releases/v5.3.1/css/all.css" integrity="sha384-mzrmE5qonljUremFsqc01SB46JvROS7bZs3IO2EmfFsd15uHvIt+Y8vEf7N7fWAU" crossorigin="anonymous">
  <title>Login</title> 
</head> 
<body> 


<div class="container">
		<?php 
		if(isset($ermsg) && !empty($ermsg)) {
			echo '<div class="alert alert-danger" role="alert">'.$ermsg.'</div>';
		}
		?>
	<div class="d-flex justify-content-center h-100">
		<div class="card">
			<div class="card-header">
				<h3>Login</h3>
			</div>
			<div class="card-body">
				<form method="post">
					<div class="input-group form-group">
						<div class="input-group-prepend">
							<span class="input-group-text"><i class="fas fa-user"></i></span>
						</div>
						<input type="text" name="username" class="form-control" placeholder="username">
						
					</div>
					<div class="input-group form-group">
						<div class="input-group-prepend">
							<span class="input-group-text"><i class="fas fa-key"></i></span>
						</div>
						<input type="password" name="password" class="form-control" placeholder="password">
					</div>
					<div class="form-group">
						<input type="submit" name="submit" value="Login" class="btn float-right login_btn">
					</div>
				</form>
			</div>
		</div>
	</div>
</div>


  <!-- Optional JavaScript --> <!-- jQuery first, then Popper.js, then Bootstrap JS --> 
  <script src="https://code.jquery.com/jquery-3.2.1.slim.min.js" integrity="sha384-KJ3o2DKtIkvYIK3UENzmM7KCkRr/rE9/Qpg6aAZGJwFDMVNA/GpGFF93hXpG5KkN" crossorigin="anonymous"></script> 
  <script src="https://cdnjs.cloudflare.com/ajax/libs/popper.js/1.12.9/umd/popper.min.js" integrity="sha384-ApNbgh9B+Y1QKtv3Rn7W3mgPxhU9K/ScQsAP7hUibX39j7fakFPskvXusvfa0b4Q" crossorigin="anonymous"></script> 
  <script src="https://maxcdn.bootstrapcdn.com/bootstrap/4.0.0/js/bootstrap.min.js" integrity="sha384-JZR6Spejh4U02d8jOt6vLEHfe/JQGiRRSQQxSfFWpi1MquVdAyjUar5+76PVCmYl" crossorigin="anonymous"></script> 
</body> 
</html>


After successful login, it will display a simple index.php page with the logout button for logout when needed.

index.php

<?php 
session_start();
// if the user is not logged in, then redirect to the login page
if(!isset($_SESSION["user_id"])){
    header("location:login.php");
    exit();
}
?>
<!DOCTYPE html>
<html lang="en">
  <head>
    <!-- Required meta tags -->
    <meta charset="utf-8">
    <meta name="viewport" content="width=device-width, initial-scale=1, shrink-to-fit=no">

    <!-- Bootstrap CSS -->
    <link rel="stylesheet" href="https://maxcdn.bootstrapcdn.com/bootstrap/4.0.0/css/bootstrap.min.css" integrity="sha384-Gn5384xqQ1aoWXA+058RXPxPg6fy4IWvTNh0E263XmFcJlSAwiGgFAW/dAiS6JXm" crossorigin="anonymous">

    <title>Simple Bootstrap4  - Login PHP/MySQL</title>
  </head>
  <body>
    <h1>Login Successful !</h1>
    <h2>
    <a href="logout.php">
    <button class="btn btn-warning">Logout</button>
    </a>
    </h2>
    <!-- Optional JavaScript -->
    <!-- jQuery first, then Popper.js, then Bootstrap JS -->
    <script src="https://code.jquery.com/jquery-3.2.1.slim.min.js" integrity="sha384-KJ3o2DKtIkvYIK3UENzmM7KCkRr/rE9/Qpg6aAZGJwFDMVNA/GpGFF93hXpG5KkN" crossorigin="anonymous"></script>
    <script src="https://cdnjs.cloudflare.com/ajax/libs/popper.js/1.12.9/umd/popper.min.js" integrity="sha384-ApNbgh9B+Y1QKtv3Rn7W3mgPxhU9K/ScQsAP7hUibX39j7fakFPskvXusvfa0b4Q" crossorigin="anonymous"></script>
    <script src="https://maxcdn.bootstrapcdn.com/bootstrap/4.0.0/js/bootstrap.min.js" integrity="sha384-JZR6Spejh4U02d8jOt6vLEHfe/JQGiRRSQQxSfFWpi1MquVdAyjUar5+76PVCmYl" crossorigin="anonymous"></script>
  </body>
</html>


logout.php

This uses for clear the login session we created and destroy all other sesions by destroying the session and redirect back to the login page.

<?php 
session_start();
// Unset all session variables
$_SESSION = array();
// Destroy the session.
session_destroy();
// Redirect to the login page
header("location:login.php");
exit();
?>

Download the complete source code sample database from my Github: https://github.com/lahirutm/Bootstrap-4-Login-Page—PHP-MySQL