Basic information about ESP32

Table Of Contents

Blog language: en.

Basic information about ESP32

Blog language: en.

Introduction to ESP32

The ESP32 is a powerful microcontroller that has gained popularity in the field of embedded systems. It is known for its versatility and capabilities, making it a popular choice among developers and hobbyists alike. With its dual-core processor and built-in Wi-Fi and Bluetooth capabilities, the ESP32 offers a wide range of features that make it ideal for various applications.

Features of ESP32

One of the key features of the ESP32 is its dual-core processor, which allows for multitasking and improved performance. Additionally, the built-in Wi-Fi and Bluetooth capabilities make it easy to connect the ESP32 to other devices and networks. The ESP32 also offers a variety of GPIO pins, analog-to-digital converters, and other hardware features that make it suitable for a wide range of projects.

Applications of ESP32

The ESP32 is used in a variety of applications, including home automation, IoT devices, robotics, and more. Its low power consumption and connectivity options make it ideal for projects that require wireless communication and remote monitoring. Whether you are a beginner or an experienced developer, the ESP32 provides a versatile platform for building innovative projects.

Getting started with ESP32

To get started with the ESP32, you will need a development board, such as the popular ESP32 DevKit. You can program the ESP32 using the Arduino IDE or other development environments, making it easy to get started with your projects. There are plenty of resources available online to help you learn more about programming and using the ESP32 effectively.

Troubleshooting common issues

Despite its many advantages, the ESP32 may encounter some common issues that you should be aware of. One common problem is connectivity issues with Wi-Fi or Bluetooth, which can often be resolved by updating the firmware or checking the connections. Additionally, power-related issues or software bugs can also cause problems with the ESP32. By familiarizing yourself with these common issues and troubleshooting steps, you can ensure a smooth development process with the ESP32.

Remember, the ESP32 is a versatile and powerful microcontroller that can be used in a wide range of projects. Whether you are a beginner or an experienced developer, the ESP32 offers a wealth of features and capabilities to help you bring your ideas to life. Start exploring the world of ESP32 today and unlock the potential of this innovative platform.

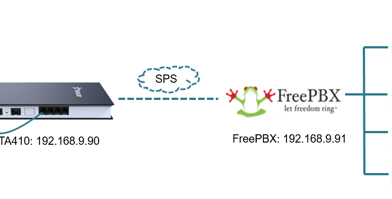
How to Use FreePBX for Intercom Telephone System

Overview of FreePBX

FreePBX is a powerful open-source graphical user interface that manages Asterisk, the leading open-source telephony engine. It provides a user-friendly way to configure and manage your PBX system efficiently. With a wide range of features and customization options, FreePBX is a popular choice for businesses looking to set up a robust and scalable communication system.

Setting up Intercom Feature in FreePBX

Setting up the intercom feature in FreePBX is essential for seamless communication within your organization. Intercom allows users to make announcements or have instant conversations without the need to dial a specific extension. To configure the intercom feature in FreePBX, navigate to the settings menu and enable the intercom module. You can then assign permissions and define the intercom extension range for easy access.

Configuring Extensions for Intercom System

To ensure smooth operation of the intercom system in FreePBX, it is crucial to configure extensions properly. Each user or device should have a unique extension assigned to them, allowing them to send and receive intercom calls seamlessly. By setting up extensions correctly, you can streamline communication and improve productivity in your organization.

Creating Intercom Groups in FreePBX

Creating intercom groups in FreePBX enables you to categorize users based on their departments or locations. This feature allows you to broadcast messages to specific groups of users, making it easier to reach the right people quickly. By creating intercom groups, you can enhance collaboration and ensure that important announcements are relayed to the relevant individuals efficiently.

Testing and Troubleshooting Intercom Telephone System in FreePBX

Once you have set up the intercom telephone system in FreePBX, it is essential to test its functionality to ensure that everything is working as intended. Conducting test calls and scenarios will help you identify any potential issues and troubleshoot them promptly. Common troubleshooting steps include checking network connectivity, verifying configurations, and ensuring that all devices are properly connected.

What is LiFePo4 Batteries

Table Of Contents

Introduction

Sure, here’s the continuation of the article:

Introduction

LiFePo4 Batteries have gained significant popularity in recent years due to their exceptional performance and reliability. In this comprehensive blog, we will delve into the various aspects of LiFePo4 batteries, including their overview, advantages, disadvantages, applications, charging and discharging characteristics, comparison with other battery technologies, safety considerations, and maintenance and care. So, let’s get started!

Overview of LiFePo4 Batteries

LiFePo4, which stands for Lithium Iron Phosphate, is a type of rechargeable battery that belongs to the lithium-ion family. These batteries are known for their high energy density, long cycle life, and impressive thermal stability. LiFePo4 batteries have become a preferred choice for various applications, ranging from electric vehicles and renewable energy storage to portable devices and marine applications.

Advantages of LiFePo4 Batteries

One of the key advantages of LiFePo4 batteries is their enhanced safety compared to other lithium-ion batteries. They have a lower risk of thermal runaway, making them less prone to overheating or catching fire. Additionally, LiFePo4 batteries offer a longer lifespan, with a typical cycle life of 2000 to 5000 cycles, depending on the depth of discharge.

Disadvantages of LiFePo4 Batteries

While LiFePo4 batteries have many advantages, it’s important to consider their limitations as well. One of the main disadvantages is their comparatively lower energy density when compared to other lithium-ion battery chemistries. This means that LiFePo4 batteries may have a larger physical size and weight for a given energy capacity. However, advancements in technology are continuously improving the energy density of LiFePo4 batteries.

Applications of LiFePo4 Batteries

LiFePo4 batteries find applications in a wide range of industries. They are extensively used in electric vehicles (EVs) due to their high power density, fast charging capabilities, and long cycle life. These batteries are also utilized in renewable energy systems, such as solar and wind power storage, as they provide reliable and efficient energy storage solutions. Additionally, LiFePo4 batteries are commonly used in portable devices, like laptops and smartphones, as well as in marine applications for powering boats and yachts.

Charging and Discharging Characteristics

LiFePo4 batteries have unique charging and discharging characteristics. They can be charged at higher currents, allowing for faster charging times. Moreover, LiFePo4 batteries exhibit a relatively flat discharge curve, providing a stable voltage output throughout most of their discharge cycle. This makes them ideal for applications where a consistent power supply is required.

Comparison with Other Battery Technologies

When comparing LiFePo4 batteries with other battery technologies, such as lithium cobalt oxide (LiCoO2) or lithium manganese oxide (LiMn2O4), several factors come into play. LiFePo4 batteries offer better thermal stability, improved safety, and a longer lifespan. However, they have a lower energy density, as mentioned earlier. The choice of battery technology depends on the specific requirements of the application, considering factors like energy density, power output, and safety considerations.

Safety Considerations with LiFePo4 Batteries

LiFePo4 batteries are considered safer than other lithium-ion batteries due to their intrinsic chemical stability and resistance to thermal runaway. However, it is essential to handle and use them according to the manufacturer’s guidelines to ensure optimal safety. This includes using appropriate charging equipment, avoiding overcharging or over-discharging, and protecting the batteries from extreme temperatures.

Maintenance and Care of LiFePo4 Batteries

To maximize the lifespan and performance of LiFePo4 batteries, proper maintenance and care are crucial. It is recommended to store LiFePo4 batteries in a cool and dry environment, away from direct sunlight and moisture. Regularly checking the battery’s voltage and capacity can help monitor its health. Additionally, following the manufacturer’s instructions for charging and discharging can prolong the battery’s lifespan.

Conclusion

In conclusion, LiFePo4 batteries offer a range of advantages that make them a popular choice for various applications. Their safety, long cycle life, and compatibility with different industries make them a reliable energy storage solution. However, it’s important to consider their energy density limitations and follow proper maintenance practices to ensure optimal performance and longevity.

With this comprehensive overview, you now have a solid understanding of LiFePo4 batteries and their significance in today’s energy landscape. Whether you’re considering them for your electric vehicle or renewable energy system, LiFePo4 batteries are a promising technology that continues to revolutionize the way we harness and store energy.

How to make 12V 18650 battery pack for solar system

Introduction

Welcome to our comprehensive guide on how to make a 12V 18650 battery pack for a solar system. In this article, we will walk you through the step-by-step process of creating your own battery pack using 18650 batteries. Whether you are a DIY enthusiast or someone looking to power your off-grid solar setup, this guide will provide you with all the necessary information to get started.

Understanding the 18650 battery

Before we dive into the construction process, let’s take a moment to understand what exactly an 18650 battery is. The 18650 battery is a type of rechargeable lithium-ion battery commonly used in various electronic devices. It is known for its high energy density, long cycle life, and excellent performance. These characteristics make it an ideal choice for building a reliable and efficient battery pack for solar systems.

Choosing the right components for the battery pack

Now that we have a basic understanding of 18650 batteries, let’s discuss the components you will need to assemble your battery pack. Apart from the 18650 batteries themselves, you will require a battery holder or a battery case, nickel strips for interconnecting the batteries, and a battery management system (BMS) to ensure safe charging and discharging.

Preparing the 18650 batteries for the pack

Before we start assembling the battery pack, it’s essential to properly prepare the 18650 batteries. Begin by checking the voltage of each battery using a multimeter to ensure they are all at a similar level. Next, remove any protective wrapping or insulation from the batteries, being cautious not to damage the cells. This step will allow for better heat dissipation during operation.

Soldering the battery cells together

Now comes the critical step of soldering the battery cells together to form the pack. Start by aligning the batteries in a series or parallel configuration, depending on your desired voltage and capacity. Use nickel strips to connect the positive and negative terminals of the batteries, ensuring secure and reliable connections. Take necessary precautions while soldering to prevent overheating the cells.

Adding a battery management system (BMS)

A crucial aspect of any battery pack is the inclusion of a battery management system (BMS) to protect the cells from overcharging, overdischarging, and excessive current. The BMS monitors and balances the individual cell voltages, ensuring the overall health and longevity of the battery pack. It is recommended to choose a BMS that is compatible with your battery configuration and solar system requirements.

Connecting the battery pack to the solar system

With the battery pack assembled and the BMS in place, it’s time to connect it to your solar system. Ensure you have the necessary cables and connectors to establish the connection between the battery pack, solar panels, charge controller, and inverter. Follow the manufacturer’s guidelines and wiring diagrams to ensure a proper and safe connection.

Testing and troubleshooting the battery pack

Once all the connections are made, it’s crucial to test the battery pack and troubleshoot any potential issues. Use a multimeter to verify the voltage, check for any abnormal temperature rise during charging or discharging, and monitor the performance of the solar system. If any problems arise, refer to the manufacturer’s instructions or seek professional assistance.

Safety precautions and considerations

When working with batteries and solar systems, safety should be a top priority. Always wear protective gear, such as gloves and safety glasses, when handling batteries and while soldering. Ensure proper ventilation in the area where you are working and keep flammable materials away. Follow all safety guidelines provided by the battery and solar system manufacturers to avoid accidents or damage.

Conclusion

In conclusion, building your own 12V 18650 battery pack for a solar system is an achievable and rewarding project. By following the steps outlined in this guide and taking necessary safety precautions, you can create a reliable and efficient energy storage solution for your off-grid or backup power needs. Remember to regularly monitor and maintain your battery pack to ensure optimal performance and longevity. Happy solar system battery pack building!

And with that, we’ve reached the end of our comprehensive guide on making a 12V 18650 battery pack for a solar system. We hope you found this article helpful and informative. If you have any further questions or need additional assistance, feel free to reach out. Happy DIY-ing!

Docker Vs Podman

Introduction

In this blog, we will dive into the world of containerization with a focus on two powerful tools: Docker and Podman. Containerization has revolutionized the way we develop, deploy, and manage applications, providing a lightweight and scalable approach. Let’s explore the intricacies of Docker and Podman and understand how they can benefit your projects.

Understanding Docker

Docker Overview: Docker is an open-source platform that enables developers to automate the deployment of applications inside containers. Containers are lightweight, isolated environments that package an application with its dependencies, making them portable and easy to deploy across different systems.

Features of Docker: Docker provides a range of powerful features that enhance the containerization experience. These include:

  • Efficient resource utilization
  • Isolation of applications
  • Easy scalability
  • Version control and image management
  • Networking capabilities

Docker Architecture: Docker follows a client-server architecture, where the Docker client communicates with the Docker daemon to build, run, and manage containers. The architecture consists of various components, including the Docker Engine, Docker Images, and Docker Hub, which is a repository for Docker images.

Exploring Podman

Podman Overview: Podman, on the other hand, is an alternative container engine that provides a similar experience to Docker but without the need for a daemon. It offers a daemonless and rootless container engine, making it ideal for environments where security and isolation are paramount.

Key Differences between Docker and Podman: While Docker and Podman share many similarities, there are a few key differences worth noting. Unlike Docker, Podman does not require a separate daemon, allowing users to run containers as non-root. Additionally, Podman utilizes the Container Runtime Interface (CRI) to interact with various container runtimes, providing flexibility and compatibility with different tools.

Benefits of Using Podman: Podman brings several benefits to the table, such as enhanced security, improved resource management, and simplified container management. With Podman, developers can enjoy the benefits of containerization without sacrificing security or needing root access.

Use Cases for Docker and Podman

Containerization in Development Environments: Docker and Podman are valuable tools for creating consistent development environments. By packaging applications and their dependencies into containers, developers can ensure that their code runs consistently across different machines, reducing the “it works on my machine” problem.

Container Orchestration: Both Docker and Podman excel in container orchestration, allowing developers to manage and scale containers across multiple hosts. Docker provides a robust solution with its native orchestrator, Docker Swarm, while Podman integrates seamlessly with popular orchestration platforms like Kubernetes.

Continuous Integration and Deployment: Docker and Podman play a crucial role in CI/CD pipelines, enabling developers to package applications into containers and deploy them efficiently. By encapsulating the application and its dependencies, containers simplify the deployment process and promote consistent and reliable software delivery.

Conclusion

In conclusion, Docker and Podman are powerful tools that have revolutionized the way we develop, deploy, and manage applications. While Docker remains the go-to choice for many, Podman offers a compelling alternative with its daemonless and rootless approach. Whether you choose Docker or Podman, containerization brings numerous benefits, such as improved scalability, portability, and security. Stay tuned for more exciting developments in the world of containerization!

Python – A Programing Language

Since the early 1990s, there has been a constant that is happening rapidly, at least on the consumer end. There were initially websites that were used. There were companies working on software on the outskirts. However, as the smartphone market grew, there was a lot going on. There was a lot of back and forth in order to automate the entire process of implementing and conceiving app features. App features that can provide recommendations based on acute data analysis are also available.

These systems could recommend products to you in the same way that your best friend could. Despite the fact that different programming languages were used for its implementation, Python became popular and is still one of the top contenders in the field of machine learning.

The language interpreters are available for a variety of operating systems. Python’s resources are managed and directed by a non-profit organisation known as the Python Software Foundation. Also, when we talk about development, it is done by a global community of developers. They maintain CPython, an open-source reference implementation of the Python programming language.

What are the reasons for its widespread acceptance?

👉 Simple to Use
Python syntax is quite simple, and Python has chosen to eliminate more trivial issues.
When compared to other languages, the language can save you a lot of lines. It is also highly effective and makes complex software development much easier.

👉 Broad Library and Framework Support
Python’s libraries and frameworks are one of the main reasons it is preferred over other languages. All of these can be used to help with development.

👉 Neural networks
It is a subset of machine learning with a distinct application. These learning systems are inspired by the brains of humans and animals. In this case, the machine learns by acquiring task-oriented rules. Image recognition is one of the best examples of this. Python provides a number of tools to assist you with this.

👉 Community and Support
There is no doubt that the language has strong support, as it is backed by one of the best tech companies, Google. Aside from that, there are numerous forums, websites, and video tutorials where Python is discussed and taught. This creates a much more welcoming environment in which the language can be taken seriously.

Growatt Inverter Client App – Java Client

Java Client for the Growatt Inverter

This Java application currently supports 3 main actions.

A1) Notify when the grid voltage is 0v (i.e. Power cut)

A2) Change power input priority (SUB / SBU)

A3) Change battery charging priority (Solar Only / Solar Priority)

A1) Notify when the grid voltage is 0v (i.e. Power cut).

Currently, the Growatt mobile app does not have any notification mechanism to alert when the grid power goes away. This app uses an ugly hack to achieve that up to some level.

The application keeps polling (once every 5 minutes) the Growatt cloud and checks if the Grid voltage is 0v. If it is, it fires a configured Gmail webhook which sends a chat message to the user. Since the Datalogger only uploads data once every 5 minutes, we can’t get an accuracy higher than 5 minites even if we change the app to run more frequently.

This will also send a power status chat every day at 7 AM to let you know that the app is running properly.

Note: Please don’t use this action unless you really need it, as this introduces considerable traffic to the Growatt cloud.

A2) Change power input priority (SUB / SBU)

This can be used to change power input priority of the inverter automatically, based on a time schedule.

This is written as a test case so that it can be automated using a Git Action workflow. Have a look at the Github workflow files in this repo.

A3) Change battery charging priority (Solar Only / Solar Priority)

This can be used to change the battery charging priority of the inverter automatically.

This is also written as a test case.

How to run?

  1. Configure authentication details in the Configurations.java file.
  2. To run #A1, build the repo and simply run the main method of the Monitor.java class.
  3. To run #A2 manually, you can use the below command.
mvn clean install -P change-settings -Dtest="MonitorTest#testOutputChangeToSUB"

or

mvn clean install -P change-settings -Dtest="MonitorTest#testOutputChangeToSBU"

To automate #A2, create a private git clone of this repo (as you’re configuring your credentials in step 1). Change cron jobs based on your requirement.

  1. To run #A3 manually, you can use the below command.
mvn clean install -P change-settings -Dtest="MonitorTest#testChargingChangeToSolarOnly"

or

mvn clean install -P change-settings -Dtest="MonitorTest#testChargingChangeToSolarPriority"


Special Thanks to bhathiya/growatt-inverter-client

Sako Isun Inverter USB Driver + Monitoring

This is an Solar inverter monitoring and controlling system for hybrid inverters, Following are the main components in the system.

  • Solar Inverter driver program to communicate with USB serial port (Python)
  • Python Flask based REST API to expose the data
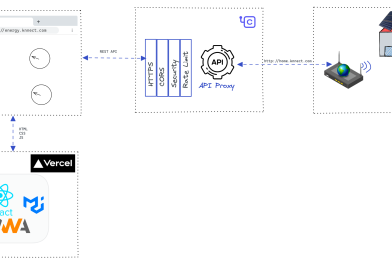
  • ReactJS based web portal (PWA) for monitoring and controlling the inverter

Tested Solar inverters

Currently we have tested this on Sako Isun 3KW.

Supported compute devices

  • Raspberry pi
  • Orange pi
  • Any Unix device

Hardware setup

  • Use the USB cable provided with the inverter or any appropriate USB cable
  • Connect the USB cable to any of the supported device
  • Install the pre-requisite mentioned in the following install steps
  • Run the tools/check-inverter.py script to connection between inverter and the compute device
  • For any issues check the Troubleshoot section

How it works

Most of the Hybrid(Chinees) inverters comes with the following Serial interface

Bus 001 Device 002: ID 0665:5161 Cypress Semiconductor USB to Serial

For this VendorID and ProductID there are several UPS and inverter devices using this serial com device. But this device had no drivers for Raspberry pi, So when the inverter is connected to a Raspberry pi(or similar) compute device , it detects as a USB block storage device

/dev/usb/hiddev0

not as a USB serial communication device.

i:e

/dev/ttyS0 or /dev/USB0

To establish communication between the inverter and the compute device we had to use pyUSB approach described in here. For the basic working principles of Inverter – Compute device (Raspberry pi) communication check the above article.

Another important piece of the puzzle was to find out the communication protocol. This document from a random generous Czech inverter site.

Without this, Decoding the values sent from inverter was a challenge

and the meanings of

  • QPIGS: Device general status parameters inquiry

and

  • QMOD: Device Mode inquiry

were like greek!

Once the communication is established it’s was just a matter of routing the data to client application (React app) to present the data.

We use Flask to implement REST API and ReactJS, MUI , React Query in the UIs.

Install

Most of the Raspberry pi & Orange Pi variations doesn’t come with pip pre-installed, Hence we have to run this

  • sudo apt-get install python3-pip

Install the Python USB communication library

  • python3 -m pip install pyusb

This is required for the following crc16 library

  • sudo apt-get install python3-dev

CRC16 is used to generate the 2 byte CRC, CRC is a way of detecting accidental changes in data storage or transmission

| Note: This only works upto python 3.9 versions, If you have a latest version of Python 3.10+, This will not work

  • python3 -m pip install crc16

Add a Udev rule as shown below, This is required to allow communicating with the USB device for none-sudoers users. Example file is given in

references/99-knnect.rules

in this repo

  • sudo vim /etc/udev/rules.d/99-.rules

Restart the Udev admin to apply the changes

  • sudo udevadm control –reload-rules && sudo udevadm trigger

Accessing from anyway

Currently this only support monitoring through the local network, If you want to monitor or control the device through internet, Then you need to expose the APIs through Choreo (It’s free) like API proxy service or Buy a Blynk subscription and publish data to blynk.

Troubleshoot

  • Use
sudo lsusb

to check whether the Serial Communication device has been detected by the operating system if so it show show as

Bus 001 Device 002: ID 0665:5161 Cypress Semiconductor USB to Serial

in the output of lsusb command

Special Thanks To (tmkasun/solar-hybrid-inverter-monitor)

Electron Desktop App – Camera Access

Electron is a good application building platform for Desktops (Windows, Mac & Linux). It is very easy to access local PC resources like camera in a simple local HTML file.

In this main.js file we created a electron browser and load simple java script file preload.js to access camera stream and passed to html5 video element.

main.js

const {app, BrowserWindow} = require('electron');
const path = require('path');

let mainWindow;

// This method will be called when Electron has done everything
// initialization and ready for creating browser windows.
app.on('ready', function() {
  // Create the browser window.
  mainWindow = new BrowserWindow({
    width: 800, 
    height: 600, 
    webPreferences: {
      preload: path.join(__dirname, "preload.js")
    }
  });

  // and load the index.html of the app.
  mainWindow.loadFile('index.html');

  // Emitted when the window is closed.
  mainWindow.on('closed', function() {
    // Dereference the window object, usually you would store windows
    // in an array if your app supports multi windows, this is the time
    // when you should delete the corresponding element.
    mainWindow = null;
  });
});


// Quit when all windows are closed.
app.on('window-all-closed', function() {
  if (process.platform != 'darwin')
    app.quit();
});

preload.js

navigator.mediaDevices.getUserMedia({video: true})
  .then(function(stream) {
    document.getElementById('camera').srcObject = stream;
  }).catch(function() {
    alert('could not connect stream');
  });

Download full source from here https://github.com/lahirutm/Electron-Camera-Access  and run

npm install

to install dependencies and libraries.

then

npm start

to run the sample. Then you camera stream will display in the desktop app made using Electron.

Desktop App using HTML, CSS & JavaScript

Electron is an open source library developed by GitHub for building cross-platform desktop applications with HTML, CSS, and JavaScript. Electron accomplishes this by combining Chromium and Node.js into a single runtime and apps can be packaged for Mac, Windows, and Linux.

Before proceeding with this tutorial, you should have a basic understanding of Javascript and HTML. You also need to know about a few native Node.js

Electron enables you to create desktop applications with pure JavaScript by providing a runtime with rich native APIs.

To get started with developing using the Electron, you need to have Node and npm installed.

First download sample app from this URL. https://github.com/lahirutm/electron-test-apps

According to the main.js file, we open index.html file in a electron browser window.

const { app, BrowserWindow, ipcMain } = require("electron");

let mainWindow;

function createWindow() {
  mainWindow = new BrowserWindow({
    width: 800,
    height: 600
  });

  mainWindow.loadFile("index.html");
}

// This method will be called when Electron has finished
// initialization and is ready to create browser windows.
// Some APIs can only be used after this event occurs.
app.whenReady().then(() => {
  createWindow();

  app.on("activate", function () {
    // On macOS it's common to re-create a window in the app when the
    // dock icon is clicked and there are no other windows open.
    if (BrowserWindow.getAllWindows().length === 0) createWindow();
  });
});

// Quit when all windows are closed, except on macOS. There, it's common
// for applications and their menu bar to stay active until the user quits
// explicitly with Cmd + Q.
app.on("window-all-closed", function () {
  if (process.platform !== "darwin") app.quit();
});


To run this app open a terminal & run below command to install dependencies & libraries.

npm install

then run this to start the example app.

npm start

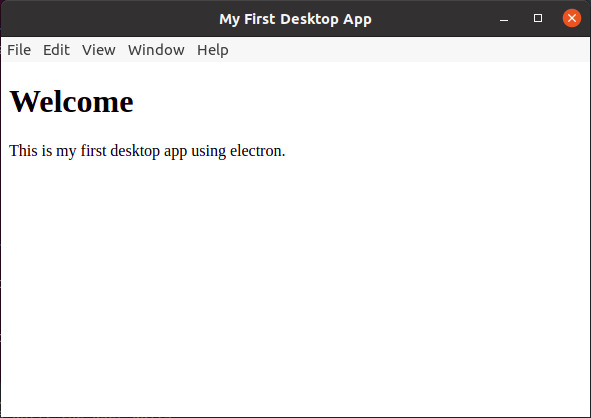
Then example app will open.