Things you need: Arduino Nano, 3V LED, 100 Ohm Resistor
To power up the Arduino Nano board, you can use USB cable or an external power supply (7V ~ 12V DC) by connecting positive pin to VIN and and negative to the ground. Please see my previous post about powering up Arduino Nano here: https://blogs.webservice.lk/2020/03/17/powering-up-arduino-nano/
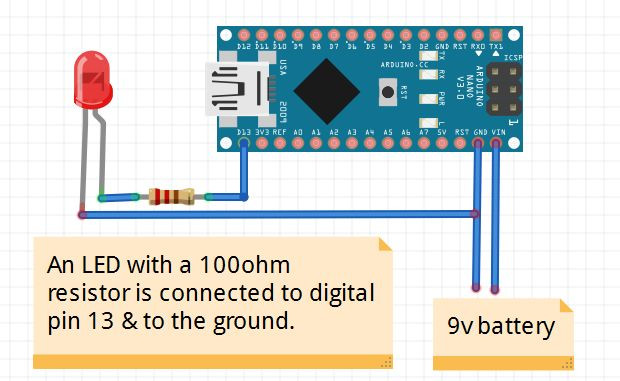
To connect LED, use LED’s positive end to the one end of resistor and other end to Arduino Nano’s digital pin 13 & negative end to the one of Arduino Nano’s ground pin. Please see the picture above.
Now circuit making part is done, Let’s do the programing.
int ledPin =  13;// the number of the LED pin

void setup() {
  // set the digital pin as output:
  pinMode(ledPin, OUTPUT);
}

void loop() {
  digitalWrite(ledPin, HIGH);   // turn the LED on (HIGH is the voltage level)
  delay(1000);                       // wait for a second
  digitalWrite(ledPin, LOW);    // turn the LED off by making the voltage LOW
  delay(1000);
}
Upload above sketch to the Arduino Nano and see the result. Led will blink with the 1 second delay.