Google assistant is AI (Artificial Intelligence) based voice command service. Using voice, we can interact with google assistant and it can search on the internet, schedule events, set alarms, control appliances, etc. This service is available on smartphones and Google Home devices.
We can control smart home devices including lights, switches, fans, thermostats and many more devices using our Google Assistant.
A lot of commercial devices already exist in the market for such application but,. Here i have explained how to build your own smart switch using NodeMCU (ESP8266) development board and few other electrical components.
Components used;
- NodeMCU (ESP8266) Development Board.
- Solid State Relay Module.
- 6V Power Supply Module.
- Connection Wires.

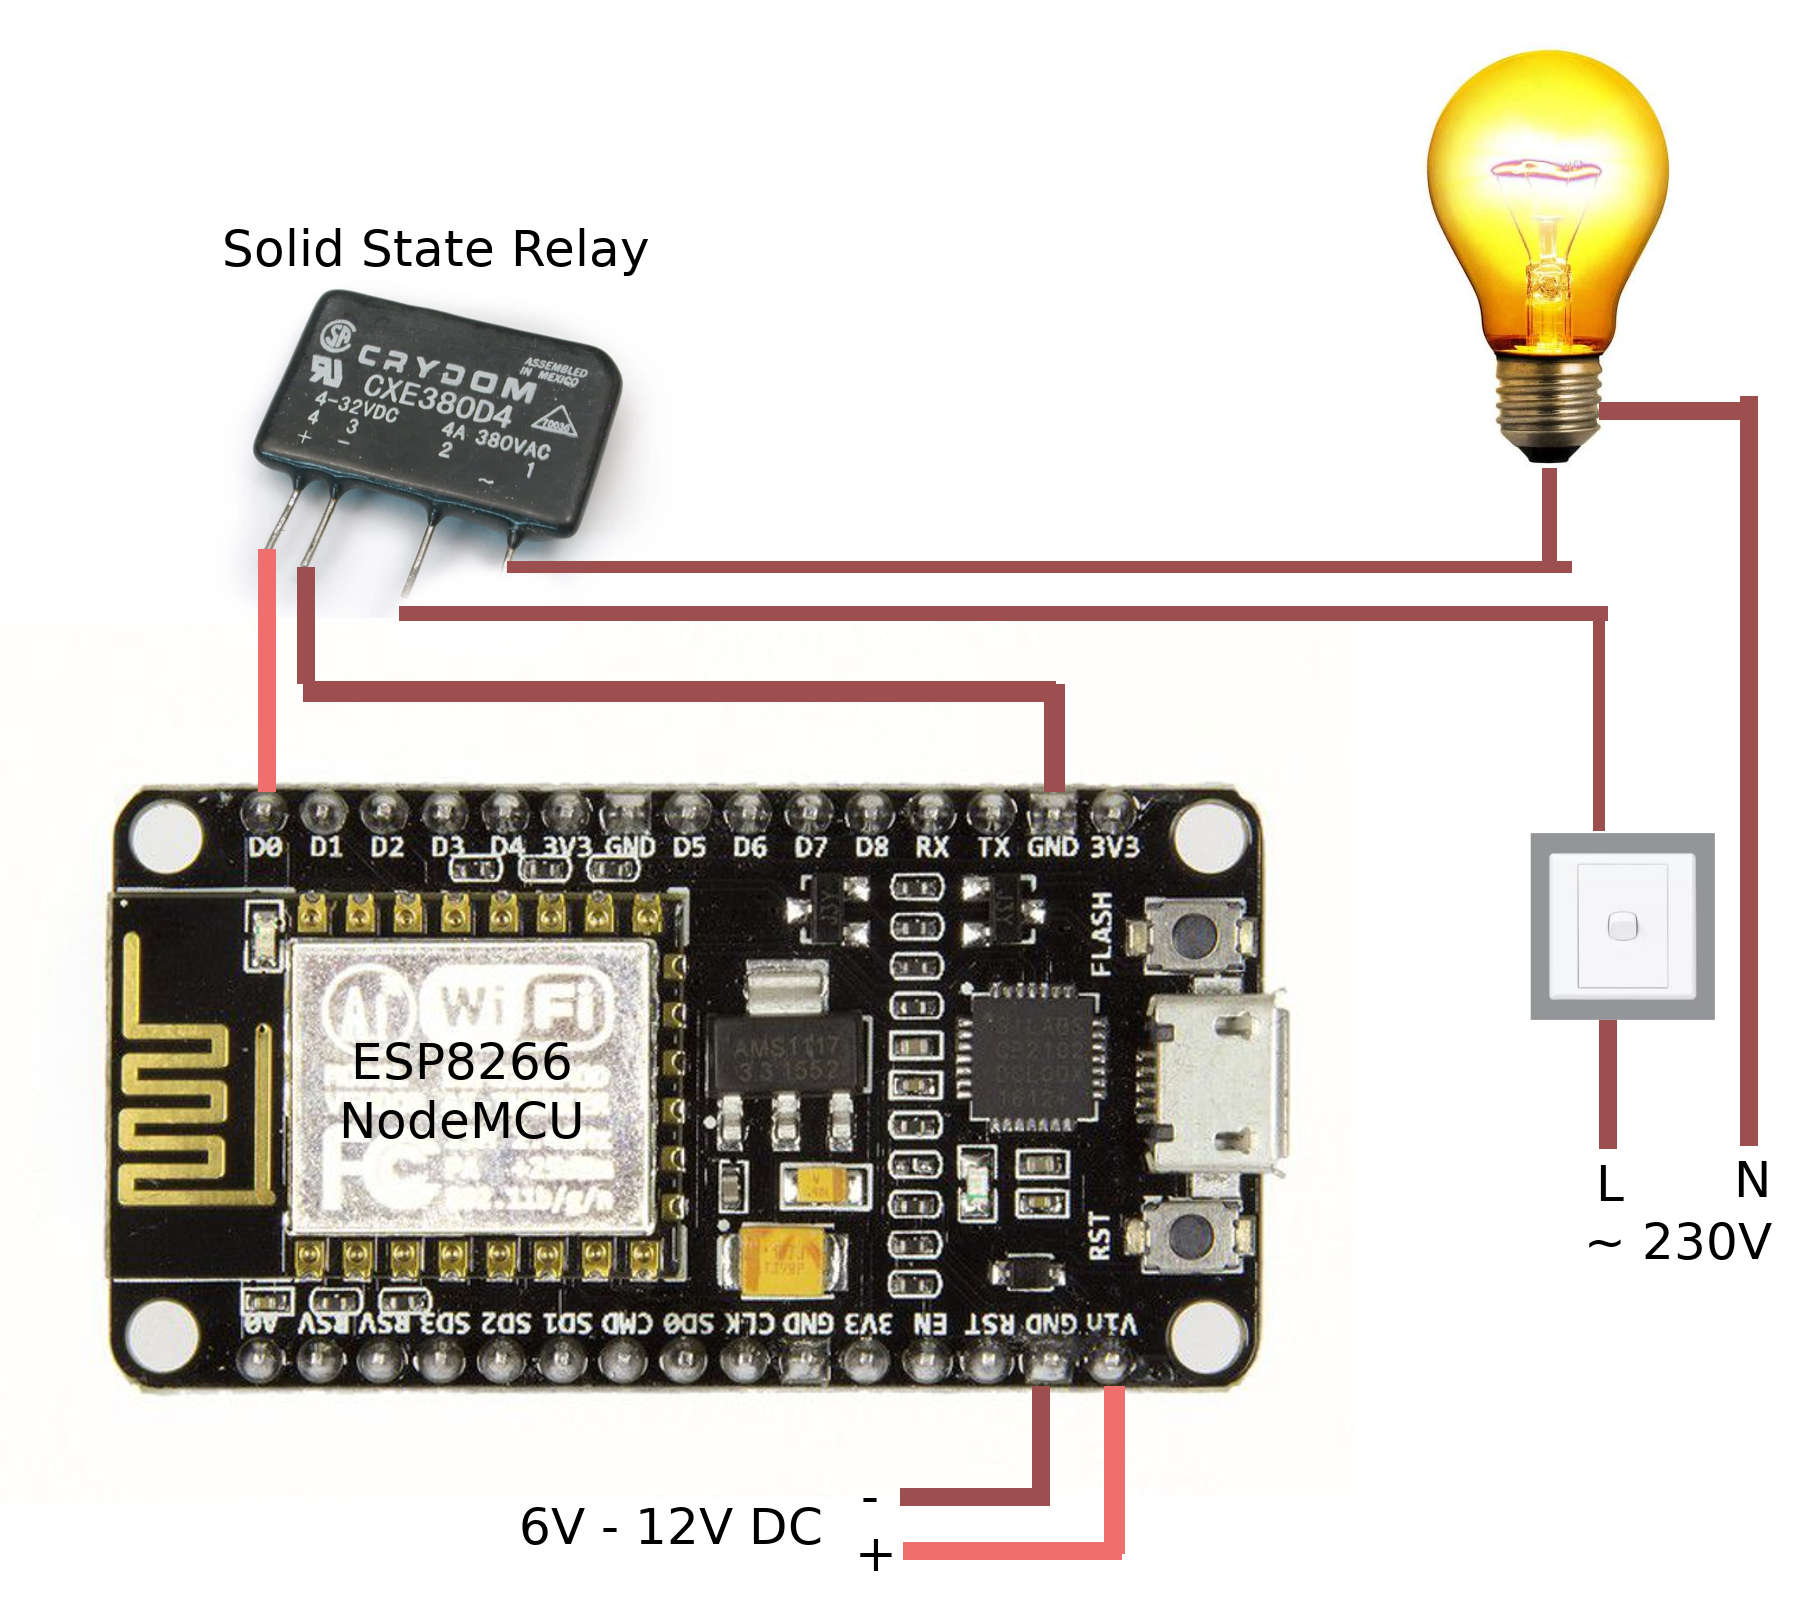
Above figure explained very simply about the circuit diagram. Be aware when you connecting this to the main power. If you don’t have enough knowledge about connecting this to the main power system, please get some help from a experienced technician.
Before you connect using above explained diagram, you must programme the NodeMCU development board. Otherwise you cannot control it using Google Smart Home Assistant with voice commands.
In above diagram, i used D0 – Digital pin to control the input signal connected to the Solid State Relay module. When we want to switch on the light, we need to set it to high voltage state (5V), and when we want to switch of the light, we need to set it to low voltage state (0V).
You can find the source code which needs to be uploaded to the NodeMCU development borad using Arduino IDE here. https://github.com/lahirutm/WebserviceLK-IoT/blob/master/arduino_examples/state_save_light_example.ino
Once you programmed your NodeMCU, you must link it with Google Home Assistant to control using voice commands. Please follow the steps explained here. https://iot.webservice.lk/
Enjoy using your own smart home devices…
